Warning: Undefined variable $k in /home/nginx/domains/wired2fishcom.bigscoots-staging.com/public/wp-content/themes/understrap-child-0.6.0/functions.php on line 984
Warning: Undefined variable $k in /home/nginx/domains/wired2fishcom.bigscoots-staging.com/public/wp-content/themes/understrap-child-0.6.0/functions.php on line 987
Hey there. Remember me? I’m the guy who’s wading through the deep waters of his own ineptitude while trying to maintain a 2001 Triton and Mercury Optimax, with little to no mechanical know-how or ability. Welcome back. If I can do it, YOU can do it. In the words of old Thomas the train: I think I can, I think I can, I think I can.
The lessons from that childhood story about the little engine that could, were lost somewhere along the way. I read a more grownup book recently called Becoming a King that stirred something inside of me, something dormant since those young days. It’s unsettled a complacent spirit that I didn’t even know I had, and now I’ve become bound and determined to do things I don’t feel confident or comfortable doing.
In the book, Becoming a King, Morgan Snyder talks about the importance of being (or becoming) a “generalist”. The author defines the term as: a guy who knows at least a little about a lot of things, and can do something with that knowledge.
In a world with its full focus on becoming a specialist, like a doctor, a lawyer or an engineer, he pointed out that we’ve outsourced the care of much of our individual kingdoms to others. There’s power and fulfillment to be found in being a generalist, able to subdue, control and fix most of what’s within his realm.
The most fortunate of us have a father like this, who has passed on real world knowledge and abilities. Perhaps an older brother, a cousin or an uncle will come to mind for others. If these aren’t the case for you, there’s still hopefully some other old head around that you can learn from. For everyone, there’s at least YouTube.
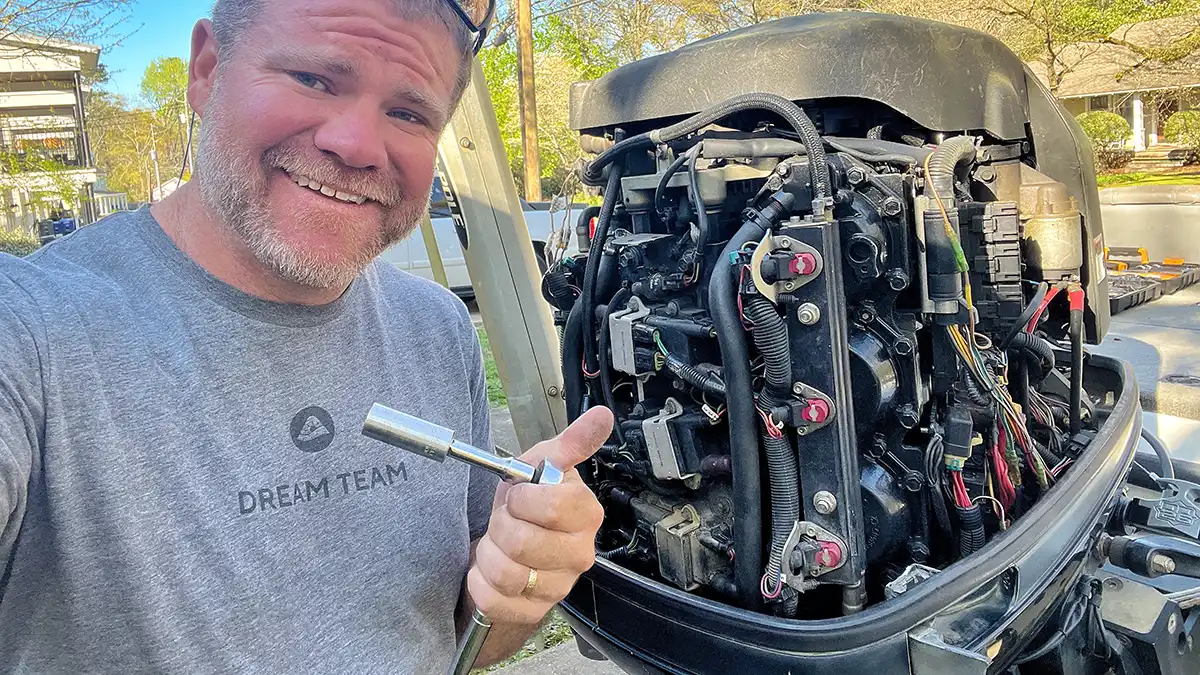
I now believe that a guy with a knife, a roll of duct tape, a pack of zip ties and a little wise counsel can take apart and put back together almost anything. With that confidence, I set out to start small and changed out the spark plugs on my Optimax. Let’s talk about it.
SIGNS IT’S TIME TO CHANGE YOUR SPARK PLUGS
- Trouble starting
- Rough idling
- Engine misfires
- Decreased acceleration
- Loss of engine power
WHERE TO START
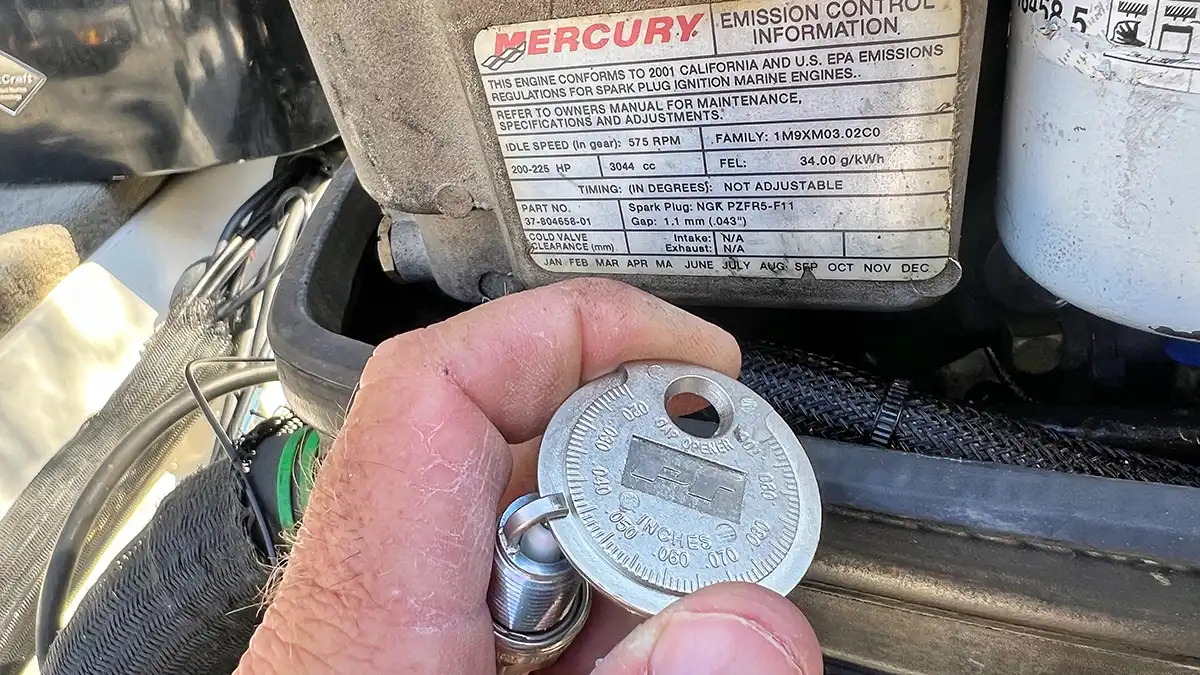
First, you’ll need to know two things: the number of spark plugs you’ll need as well as the type. Gas outboards have either one or two spark plugs per cylinder. For instance, the Optimax I have is a 6 cylinder and has 6 spark plugs. You should be able to visually identify how many spark plugs you’ll need, but a quick Google search or a look at the owner’s manual will let you know for sure.
You can also determine which model spark plug you’ll need this way. Or you can look for the information on the outboard itself (I found it on a sticker on the port side of the engine after taking the cowling off). Keep in mind, not all outboards are created equally, and none are really built to work on. Something that should be as simple as changing the spark plugs will still come with a few challenges. Mine came by way of spark plug number 6. If you know, you know. If you don’t, I’ll get there in a moment.
REMOVING THE PLUGS
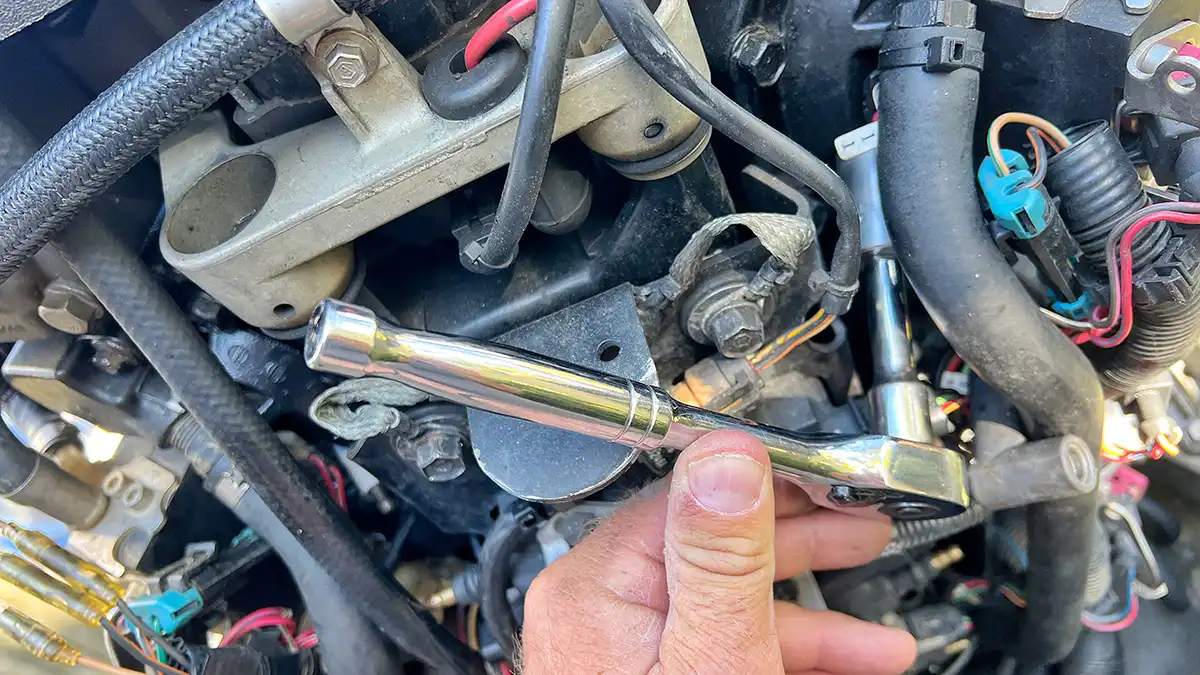
The cylinders are labeled on my Optimax, 1 through 6. The bottom one on the port side of the engine is number 6. The guy in the video I watched told me this one was going to be a booger; he was right. I was able to wiggle a socket and an extension around to get on it, added the ratchet and eased it out.
For the majority of spark plugs, you’ll need a deep well 5/8th socket with a thin wall. A different sized socket and/or a flex-head ratchet may be necessary, though I was able to get the 5/8th and a normal ratchet on all of mine.
You can also sometimes remove the lower half of your cowling to make the job easier. This was recommended in my case. Per the norm though, I was a little too hard headed and opted to wiggle and fuss until I got the socket down in there to get number 6 out.
The rest of the plugs came out with ease. I simply pulled the spark plug wires off, put the socket on the plug and gently spun them out. I did end up disconnecting a few quick-connect wires to make it a little easier to get to a few of the plugs.
INSPECT OLD PLUGS/GAP NEW ONES
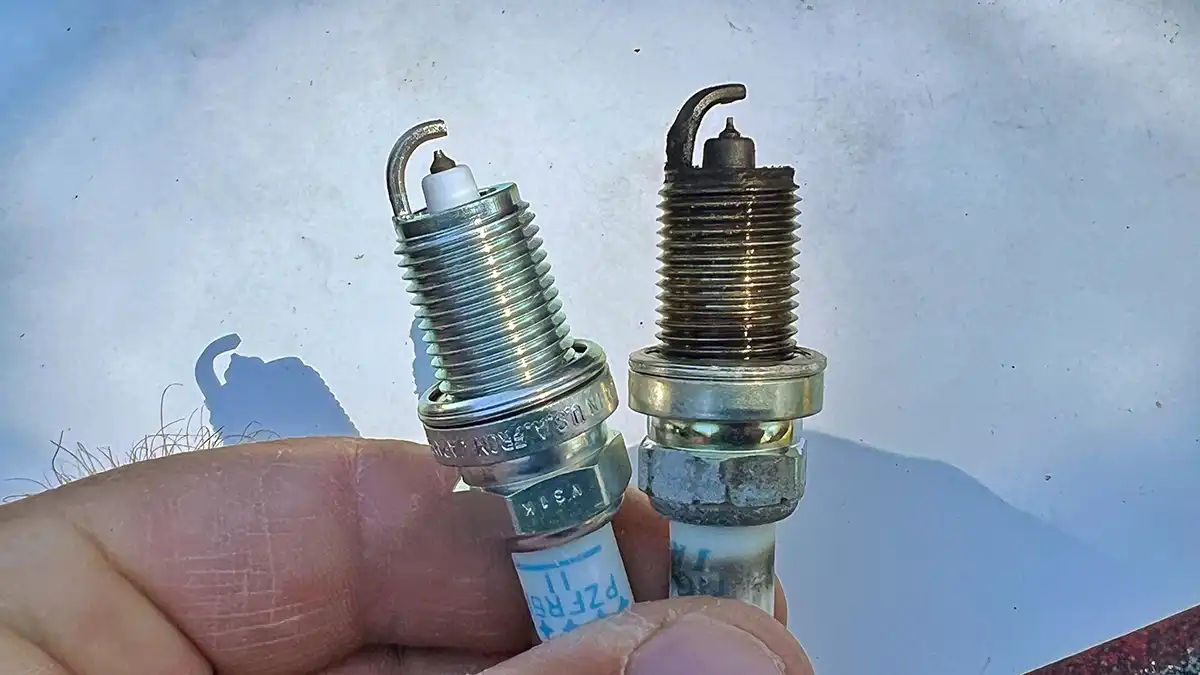
The plugs may not actually be what is causing your issues. To inspect the old plugs, look for black, oily deposits which may indicate too much oil getting to the plug. White or gray coloration may indicate overheating. Any erosion or breaks in the insulator tip, ground (or side) electrode or center electrode are pretty easy to identify. These are clear indicators that it’s time to change out the plugs.
You may need to adjust the gap of your new spark plugs before installing. If the gap between the electrodes is too narrow, the spark may be too weak or small to ignite the fuel. If the gap is too wide, the plug may not fire or miss entirely at high speeds.
I had never gapped a spark plug before, so this was a little intimidating. Everything I read said it was a simple process, so I jumped in. You can find the gap requirements for your specific motor either in your owner’s manual or on an identifier on your motor. I found the gap requirements for my plugs on the same sticker I located earlier; they were supposed to be 1.1 mm (or .043”).
You can find an inexpensive gap gauge at any auto parts store for a couple bucks. If the gap is a little too small, open it up gently by bending the side (or ground) electrode up with a flat-head screwdriver carefully. If it’s too wide, gently press the side (or ground) electrode against a bench or table. Then check the gap again and repeat the process until you get it right.
OTHER THINGS TO LOOK FOR
When installing the new plugs, be sure to start them with your hand if you can. You may need to use the socket and an extension to get the plug started. Don’t start the plug with the ratchet itself, as it can be easy to cross thread them. The plug should start to turn easily when installing. Once you’ve hand tightened the plugs, you can turn them 1/2 to 2/3 of a turn with the spark plug wrench/ratchet set.
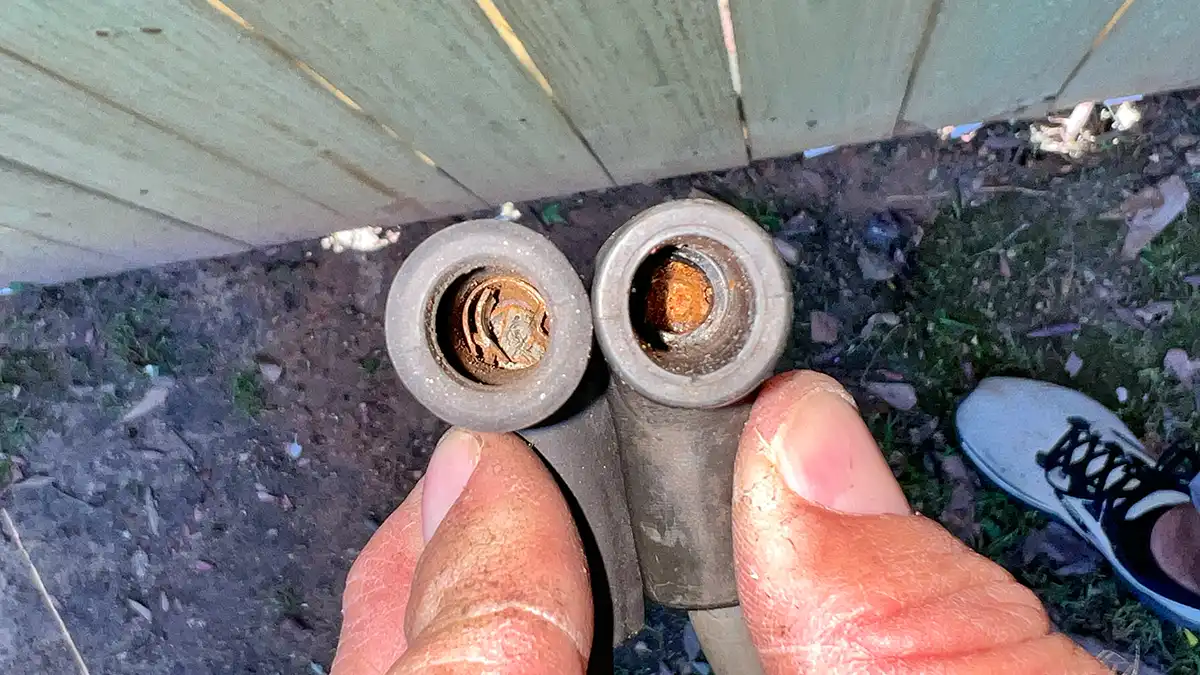
Inspect your spark plug wires while you have them off. Look for any obvious damage in the ends of the plugs. I found that one of mine had broken and rusted metal pieces down in the end. This was likely the main culprit causing my engine to lose power from time to time while running. I went ahead and bought a whole new set of 6 cables for about $25 to make sure we were firing on all cylinders again while we were at it.
A good tip from my mechanic buddy Brad Penny, if the cable doesn’t pop back on the plug snugly, you can gently tighten it by pinching it with pliers from the outside. It won’t take much to do this though, so be careful not to bend them too much or break them.
FINAL THOUGHTS
Now that it’s all said and done, I’m glad I took this little task on myself. I feel like I know more about my motor than I did before. If you’re a DIY fanatic and/or a natural tinkerer, this may not seem like that big of a job. However, if the thought of doing something as simple as this gives you instant anxiety, don’t be ashamed. I hope you’re encouraged by my experience. Rest assured, I get nervous every time I take the cowling off my motor.
Even though I’m not fully confident working on my outboard yet, I am confident that I ought to be able to do at least some basic motor maintenance. I feel more empowered now that I’ve changed out the plugs on my Optimax.
I’ll even go as far as to unashamedly admit that I’ve never changed out the gear lube on a motor myself before, or changed out an oil filter on one for that matter, much less replaced the water pump impeller. These are all on my to-do list now though. I can do it. I think I can at least and I think you can too.


